Wednesday, October 27, 2021

Alcohol Blending Technique==#tgifc339

The TGIF Challenges challenge this week is  a technique called Alcohol Blending.  I haven't tried this popular technique yet--so dove right in.  To create with this technique you need Vellum card stock (#101856) Stampin' Blends, which are alcohol based markers; and 90%+ rubbing alcohol (don't ask me what the percentage means--but it is higher than the normal 78% you usually buy off the shelf--but if you look at the labels, it is easy to find at the big box stores).  

As is so often the case for me this time of year, the inspiration for my card today were the trees and leaves in my yard.  Specifically, it was our beautiful Red Maple that is, sadly, dying.  The leaves are turning brown and not the lovely Fall red before dropping off.  I got closer to inspect a few and they were still green, one had a bit of red and a little ladybug crawling across it.   With that leaf as inspiration, I pulled out my dark Shaded Spruce, dark Just Jade and dark Poppy Parade Stampin' Blends to use with the Alcohol Blending Technique:


The alcohol blended piece forms the background on the card.  I scribbled Shaded Spruce and Just Jade Stampin' Blends on the Vellum card stock piece, then dropped the alcohol on the scribbles until they started to expand on the vellum.  I  blew the alcohol around using my Heat Tool set on low as it dried the piece.  Then I scribbled over the dried piece with the Poppy Parade Stampin' Blends in just a few places and again added the alcohol and blew and dried it with my Heat Tool (#129053).  I cut the Vellum down to 4" x 5-1/4" and layered on the same sized piece of  Basic White card stock (#159276).  It looked like Christmas paper when I was finished, but I still went with leaves!

The maple leaf image from Gorgeous Leaves stamp set (#153365, also bundled with the Intricate Leaves dies at 10% off, #158609) was stamped in Just Jade on Basic White five times, then the leaves were die cut using the coordinating die from the Intricate Leaves dies (#153566).  Two branches were die cut using the same die set out of Soft Suede card stock.  The greeting is from the Pretty Pumpkins stamp set (#1564712).  It was stamped in Soft Suede and die cut using a die from the Tasteful Labels die set (#152886).  A doubled length of Linen Thread (#104199) tied in a bow completes the card.

This alcohol blending technique makes some stunning cards.  See them over at the TGIF Challenges Blog here:


Have a great week!
--Sara Nell 


Thursday, October 21, 2021

Spooky, Scary Halloween--#tgifc338

The inspiration challenge at TGIF Challenges this week is Halloween.  I know I've told you this before, but my two-year-old grandson Easton is all into Halloween this year.  He says "Spooky, scary Halloween".  We have gotten lots Facetime calls because Easton wants to show his new ghost or new pumpkin or spider decorations to Grandma and Grandpa.  The last call was all about his Mickey Mouse Halloween pajamas.   So my projects today are all for Easton.  I thought I'd have a little fun creating a trio of note cards (Basic White note cards & envelopes, #159232) to mail at intervals to Easton leading up to Trick or Treat day:


These are all just quick, simple cards using the Cute Halloween Suite (#156279).  The suite includes the Cutest Halloween stamp set (#156480), the Halloween Punch (#156482), Tombstone Treat Boxes (#156486, not used today), Cute Stars Adhesive-Backed Sequins (#156484), Black & White 1/4" gingham ribbon (#156485) and Cute Halloween designer series paper (#156479). 

Here are close-ups, shown from easiest to easy!


This one is just a line of skeleton heads with two different faces and a greeting all stamped on the note card front in Blackberry Bliss.  There is a swipe of the Blackberry Bliss ink pad across the top fold of the card (to cover up some random Blackberry Bliss ink caused when I tied on a piece of Blackberry Bliss inked up baker's twine before it dried--but don't tell anyone).  I tied a piece of uncolored white baker's twine over the ink swipe.  Easton and I played hide and seek with "Skeleton Man" when I visited in September.


The ghost was punched out of and the cute little bat was fussy cut from the designer series paper then mounted right on the note card with Stampin' Dimensionals.  The greeting was stamped in Highland Heather.


The pumpkin and spiders were stamped in a grouping onto Basic White card stock, fussy cut and adhered to the layered Pumpkin Pie card stock and dotted pattern designer series paper.  The greeting was stamped in Jet Black StazOn ink onto another pattern of paper then die cut using a Tasteful Labels die (#152886).  Easton's favorite decorations are the pumpkins and giant spiders on the front porch.

Head over to the TGIF Challenges Blog here to see more Halloween inspired projects:

Are you planning your own Spooky, Scary Halloween?
--Sara Nell


Wednesday, October 13, 2021

Sending Healing Thoughts--#tgifc337

This week's sketch challenge over at TGIF Challenges took me a bit of time to work out in my head.  After mulling over design ideas with a few stamp/die bundles, I settled on the Nature's Harvest Bundle (#156813, which includes the Nature's Harvest stamp set, #156495, and coordinating Harvest Dies, #156504, at 10% off).  It turned out to be a bit of fun and an easy card to do:


I started by stamping the leafy background image over Basic White card stock in Crumb Cake, stamped off once.  Then I added three of the large triple flower images stamped in Crumb Cake to complete the background.  Next, I die cut three flowers out of Shimmery White card stock and watercolored them using Pear Pizzazz (which I thought was Old Olive until I put up my ink pads!!!), Pale Papaya, Calypso Coral, Soft Suede and a bit of Early Espresso to make seed dots in the flower center. 

I stamped the greeting in Calypso Coral and die cut it with the long label die.  A double strand of Linen Thread (#104199) tied in a bow was substituted for the scalloped piece in the sketch and three Pale Papaya Genial Gems (#155500) were substituted for the little hearts--but placed randomly around the label.

Head over to the TGIF Challenges blog to check out more projects created with this sketch:


Have a great week!
--Sara Nell


Wednesday, October 6, 2021

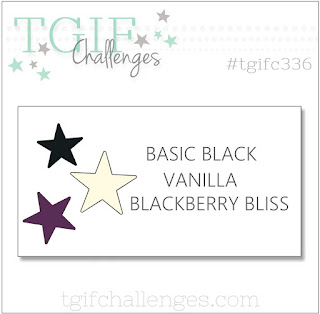
Blackberry Bliss Hello--#tgifc336

This week's TGIF Challenges color challenge was a bit of a challenge for me:  Blackberry Bliss, Basic Black and Vanilla.  Vanilla!!!!  Well, I thought it was white as I was making my card.  I'll just let you imagine the white background as vanilla on the card front and greeting tag.  You can do that, right?  Right!


The difficulty with this challenge for me was that there is very little contrast between Basic Black and Blackberry Bliss.  I mean, do you see the layer of Basic Black between the vanilla (your imagination is at work, isn't it?) top layer and the Blackberry Bliss card base?  To solve this,  I watered down the Blackberry Bliss ink with a paint brush and water on Watercolor Paper (#149612) and then die cut my leaves from the watercolor paper. The leaves and two Basic Black die cut branches were arranged over a wide splatter of Blackberry Bliss and small splatters of Basic Black and Blackberry Bliss.  The splatter images are from the Gorgeous Leaves stamp set and the die cuts were done with the coordinating Intricate Leaves die set (#153566, available in a bundle with the stamp set at 10% off, #158609). 

The greeting image is from the Artistically Inked stamp set (#154542).  It was stamped in VersaMark, heat embossed with Black Stampin' Emboss Powder and die cut using the small label die from the Harvest die set (#156504).  Three Brushed Metallic Adhesive-Backed Dots (#156506) complete the card. 

For more fun projects using this color combination, head over to the TGIF Challenges Blog here.


Have a great weekend!
--Sara Nell


Sunday, October 3, 2021

Creation Station October Blog Hop--Tis the Season To. . .


Hello!  Welcome to the October Creation Station Blog Hop!  
This is going to be an extra fun hop.  Our theme this month is  "Tis the Season 
to . . ."  We are a global community of Stampin' Up! demonstrators so we are celebrating different seasons and some localized holidays this time of year.  You are going to see lots of different seasons and holidays represented and will have loads of inspiration today.  Be sure and visit each designer's blog today by clicking on the "Next" link at the end of each blog.


In the United States, we will be celebrating Thanksgiving in November. I like to make albums for multi-generation Thanksgiving gatherings--to record the event, the "I am thankful for . . ." statements and for lots of photos to see how everyone has changed from the last big Thanksgiving family gathering.  The Harvest Meadow suite of products and this sentiment from the Pretty Pumpkins stamp set (#156472) were perfect for this album.  

The album has a beaded ribbon matchbook binding Created by Laura Denison Designs.  I thought her idea of using pony beads as spacers between pages was brilliant.  This method allows more space between pages to allow room for embellishments and lots of photos without stressing the binding.  I bookmarked her YouTube video for future reference. . .10 years ago.   Here is the link: https://youtu.be/035cTkKOkmA.   I used her measurements for the chipboard cover pieces,  the pocket pages and pull-outs--perfect for photos and journaling.  Two measurements she did not give us were for the designer series paper used for the cover:  I used two pieces of 5-1/2" x 9-5/8" designer series paper butted together at the center point of the spine piece with a 1/2" overhang for wrapping over the edge of the chipboard pieces; and the inside lining to cover the chipboard: I used two pieces of 4-3/8" X 8-1/2" designer series paper butted together at the center line of the spine.

Here's a closer look at my album:

Spine with space for date.

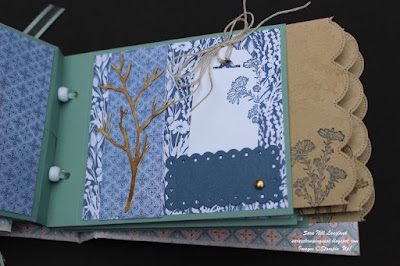
Inside front cover with space for description of gathering.  All journaling frames and labels, the front sentiment frame and tag pockets were made with the Scalloped Contours Dies (#155560).  Whisper White layers on frames were made with the Stitched Rectangles Dies (#151820).

Journaling tags were made with the Fancy Tag Topper Punch (#152711).


This is a close up of the pony beads threaded with ribbon that bind the pages to the cover.


Each pull out card in the pocket pages is 4"x 6" with the scalloped edge cut with another die from the Scalloped Contours die set. (As soon as I saw this die in the set, I knew I was going to make a mini album with scalloped pages!).

 The floral die cut images on the album cover and the front of each pocket page were watercolored and die cut.  Most of the grain images were die cut from Cork specialty paper (#156393).


The front of each pull-out card was designed for a photo of one person and the back  with a journaling label to record what that person is thankful for this year. the back and front of each pocket page was designed for photos and/or journaling.


Soft Succulent open weave ribbon (#155780) and Scalloped Lace Trim (#149593) were threaded through the back cover into each punched hole, then threaded alternately through pony beads and pocket pages to the front cover, then tied in a bow on the front.

Additional products used:

Nature's Harvest Bundle (#156813) which includes the Nature's Harvest stamp         set (#156495) and the Harvest Dies (#156504)
Timeworn Type 3D embossing folder (#156505)
Brushed Metallic Adhesive-backed Dots (#156506)
Harvest Meadow designer series paper (#156494)
Linen Thread (#104199)
Chipboard,  shamelessly hoarded from packages of Stampin' Up! specialty papers
Tear & Tape adhesive (#154031) was used to construct the album cover

I know--lots of photos in this post.  I hope you enjoyed seeing all of my mini album!  Now head over to our other Sara's blog to see what she is celebrating this season.

To Sara Levin's blog . .  .

Have a great October!
--Sara Nell


Creation Station April Blog Hop—Heat Embossing

  Welcome to the Creation Station Blog Hop for April.  Our theme this month is Heat Embossing.   We’ll be sharing heat embossing techniques ...