Sunday, February 5, 2023

Creation Station February Blog Hop--Simple & Sweet


Welcome to the Creation Station February Blog Hop!
So happy you have joined us this month for projects that are both simple and sweet.  Be sure to click on the "Next" link at the bottom of each post to see all of the projects we have prepared for you this month.  Enjoy!


For my Simple & Sweet Projects, I have made three Valentines.  Each card in the trio was created using the Country Bouquet Bundle (#160383, including the stamp set #160377 and the punch, #160382, at 10% off); Country Gingham 6" x 6" designer series paper (#160388); Linen Thread (#104199); the Banners Pick a Punch (#153608); Basic White Note Cards & Envelopes (#159232); and a color scheme of Sweet Sorbet, Mint Macaron and Soft Suede.  Two cards have a Sweet Sorbet 2022-2024 In Color Matte Decorative dot (#159186) and the third has a layer of Mint Macaron card stock and a retired Mint Macaron Genial Gem. 


Each card uses a simple stamped image on Basic White card stock, a greeting on a banner, and just two embellishments.  I used a layer of Mini Macaron card stock and a retired mint macaron embellishment on the last card to keep with the same color story as the first two.  I used different patterns from the designer series paper pack cut to cover the entire front of the note card.  The envelopes are all stamped with the same double heart image from the Country Bouquet stamp set. 

Hope you'll try making some easy sets of notecards, using these ideas.  I have used several different stamp sets to make sets of cards like these with just a simple image and a greeting on Basic White card stock.  They are fun to do!

Now let's head over to Julie Beltramo's Blog "Just Julie B Stampin'" to see what simple and sweet projects she has created to inspire us!


Happy Valentine's Day!
--Sara Nell


Sunday, January 1, 2023

January Creation Station Blog Hop: Celebrate Sale-a-Bration!


Welcome to the first Creation Station Blog Hop of 2023!
So happy that you continue to join us on our monthly hops.  We love sharing our projects with you.  This month we are Celebrating Sale-a-Bration.  It's the best time of the Stampin' Up! year when you can earn FREE products with a $50 or $100 purchase. Sale-a-Bration begins on January 5. 


The past several Sale-a-Bration product brochures have each featured free products which coordinate with products in the mini catalog introduced at the same time as Sale-a-Bration.  The new Sale-a-Bration brochure is continuing this feature with three designer series paper packs that coordinate with a stamp set and die bundle in the new January to April 2023 Mini Catalog.  I fell in love with the Dainty Delight Bundle  (#160675) in the new mini catalog and chose the Dainty Flowers designer series paper (#160834) as my FREE product choice.  I featured this paper in my three cards today just to show you how easy it is to create stunning cards with designer series paper and a greeting.  The greetings on my card are images from the Dainty Delight stamp set.


The wreath on my first card was created with three identical wreaths from one sheet of the designer series paper.  The bottom wreath image was cut out from the paper in a 5" x 3-3/4" rectangle.  The second wreath was fussy cut from the paper and layered over the bottom wreath with Stampin' Dimensionals.  The blossoms from the third wreath were fussy cut and then layered over the coordinating blossoms on the second wreath again with dimensionals, creating a 3D wreath.  The greeting was stamped in Rich Razzleberry into the center of the bottom wreath. I used my Stamparatus to stamp the greeting in Rich Razzleberry and then VersaMark, so I could emboss the greeting with Clear embossing powder.  I really like the look of embossed greetings and it is so easy to do with the Stamparatus (#146276).  A layer of Mossy Meadow and card base of Fresh Freesia complete this card.


The spray of wild flowers on this 6" x 3" card was fussy cut from the same sheet of paper as the wreaths.  This spray was adhered to a Starry Sky  pattern from the Dainty Flowers designer series paper after adhering the Fresh Freesia open weave ribbon to the bottom of the paper.  The greeting was stamped in Starry Sky, embossed with Clear embossing powder as on my first card and then die cut using a label die from the Stylish Shapes die set (#159183). A card base of Fresh Freesia completes this card.


The last card uses a 5-1/5" x 3-7/8" piece of a mirror image wildflower pattern in the paper pack.  I love using these mirror image designs--they make six card fronts from one sheet of paper and all I have to do is add a greeting to make a beautiful card.  The greeting is stamped and embossed in Rich Razzleberry and die cut with a label die from the Stylish Shapes dies.  I used a piece of the middle part of this same paper design to stamp the greeting.  A layer of Rich Razzleberry and a Basic White Thick card base complete this card.

Here is a photo of two of the designer series papers I featured on my cards.  I love all of the beautiful watercolor wildflower designs in this paper pack--you'll be seeing more!


Now it's time to hop on over to Martin Stone's blog, Martin's Mayhem, to check out his great Sale-a-Bration project:


Wishing you a joyful and happy New Year!
--Sara Nell 


Sunday, December 4, 2022

December Creation Station Hop--Holiday Happenings


Welcome to the Creation Station December Blog Hop!
We are a group of Stampin' Up! Demonstrators from around the globe who share our stamping creations each month to inspire you.  This month our theme is Holiday Happenings and, since we are a global design team, you are going to see projects for holidays and/or traditions with which you may not be familiar.  I am so looking forward to seeing what each team member is going to share.  Be sure you click on the Next link at the end of each post, so you can see each project, too.


Christmas is always a special season of celebration in my family--it may be just the two of us the day of, but we always have family visiting in December.  I traditionally fill Christmas stockings for my daughter and her family so if she visits Thanksgiving or early in December, they are ready for her to take home to put under her tree.  This year, I was excited to use the Sweetest Christmas suite to use for little extras in the stockings.  For you, I am sharing the gift card wallet which I used as a stocking stuffer in one stocking and the decorated candy canes that went in each one.


One of my favorite dies in the entire July to December Mini Catalog is the label designed to slide onto a candy cane from the Candy Canes dies (#159569).  What a fantastic way to make a candy cane a WOW little gift!  I die cut the labels for my chocolate/peppermint candy canes out of Real Red Glimmer paper (#159678, includes 4 each of Real Red and White 6"x6" sheets). Then I decorated them with a couple of Garden Green mistletoe branches die cut using the Christmas Banner dies (#159576), a greeting from the Sweet Candy Canes stamp set (#159560, bundled at 10% off with the Candy Canes dies, #161052) which was die cut using the second smallest circle die from Stylish Shapes dies (#159183),  some Red Rhinestone Basic Jewels (#146924), and a bow tied with Garden Green 3/8" ribbon from the Real Red and Garden Green combo pack, #159577).  I think I'll make some more of these to give out to visitors.


The gift card wallet was made with a design I found on Patty Bennett's Blog years ago and still use.  It is easy and fun to make and decorate.  Usually I make a ribbon or belly band closure on this wallet, but my decorations (which I think used every product in the Sweetest Christmas Suite!) were enough to hold the front flap of the wallet closed on its own. For the front, I die cut a candy cane from the Sweetest Christmas designer series paper which I adhered to a piece of Basic White card stock before die cutting, to give the paper candy cane some body.  I decorated the candy cane with several die cuts from the Christmas Banner dies using Garden Green, Pool Party and Sweet Sorbet card stock.  I added a Real Red ribbon bow and a Flat Jingle Bell Trinket (#159980).  The greeting is from the Sweet Candy Canes stamp set, stamped in Garden Green on Basic White and die cut using a die from the Painted Labels dies (#151605) which I shorten using a technique with the Stampin' Cut and Emboss Machine which I have shared with you before.  The background is a Real Red pattern from the designer series paper, a strip of a Garden Green pattern and Real Red glimmer paper.


When you lift the front flap you see two more designs from the Sweetest Christmas paper pack.  The striped design has the same color stripes as are on the candy cane on the front:  Sweet Sorbet, Pool Party, Garden Green and Real Red. 


When the wallet is fully opened you see two greetings from the Sweet Candy Canes stamp set, stamped in Sweet Sorbet and Garden Green on Basic White and the die cut using the large label die from the Painted Label dies.  This was mounted over a strip of Real Red glimmer paper and decorated with Garden Green adhesive-backed Seasonal Sequins (#159964).  The gift card pocket is decorated with a greeting and banner from the Christmas Banners bundle (#159993).  It was also stamped in Sweet Sorbet and Garden Green and decorated with more die cuts.


The wallet base is an 11-1/2" x 4-1/2" piece of Sweet Sorbet card stock, scored at 3", 3-1/8", 6-1/8" and 9-1/8".  To create the pocket you fold up the piece at the 9-1/8" score line, punch out a piece for the pull space and adhere the sides to the base.  

Give these fast and easy stocking stuffers a try for your gifts this season.  Now let's head over to Elizabeth Price's blog Seeing Ink Spots and see what amazing inspiration she has for us today.


Wishing you a very Happy Holiday Season!
--Sara Nell


Sunday, November 6, 2022

November Creation Station Blog Hop--Fancy Folds


Hello, and welcome to the Creation Station November Blog Hop!  This group of stampers from all over the world are sharing Fun & Fancy Folds projects to inspire you to add that little something, something to make your holiday cards extra special.  Be sure and click on the "Next" link at the end of each post so you can see each designer's project.  You'll be glad you did!


My projects for today's hop are Gable Fold cards.  The inspiration for my projects was my late sister-in-law, Mary Ann.  She was the biggest fan of my cards and had them displayed all over her apartment at her assisted living home in Overland Park, Kansas.  I sent her a card at least every month--whenever I made a card and thought "Mary Ann would love this one", I sent it to her.  So, needless to say, the Christmas cards had to be extra special and the Gable Fold Christmas cards were her favorites.


My candy cane card was created using the Sweetest Christmas suite of products, including the Sweet Candy stamp set and die bundle (#161052), Christmas Banner dies (#159576); Adhesive-Backed Seasonal Sequins (#159964), and the Sweetest Christmas designer series paper (#159559).  I also used some Sweet Sorbet metallic woven ribbon (#159200) and a Flat Jingle Bell Trinket (#159980).  The colors are from the designer series paper:  Sweet Sorbet, Real Red and Garden Green, plus Evening Evergreen and Mint Macaron.


What makes these Gable Folds extra fun for the holidays is the way they open up and stand on their own for display!  They fold closed to a standard card size of 5-1/2" x 4-1/4" and definitely require extra postage!


The cane card just has a bit of glitz with the metallic ribbon, but I went all out with the glimmer and shine in this holly card! For this card I used the Boughs of Holly Suite of products:  the Leaves of Holly stamp set and dies bundle (#159608), and the Boughs of Holly designer series paper (#159600).  I added some gold Adhesive-Backed Seasonal Sequins and Real Red glimmer paper (#159578) from the Sweetest Christmas Suite; and, some Gold & Vanilla satin edged ribbon (#159555) and Evening Evergreen Glimmer Paper (#159537) from the Lights Aglow suite.  I used colors from the designer series paper:  Cherry Cobbler, Real Red, and Evening Evergreen plus Old Olive and Basic White.

Hidden on the back panel of each card is a decorated piece of Basic White card stock layered over designer series paper to use for a personal note to the recipient of the card.


If you have never made a Gable Fold card, here are the basics:

Gable Card


Card base:  5-1/2” x 12”, scored at 2”, 4”, 8” and 10”


Use paper trimmer to cut from the first  score line to the last score line, 1-1/2” from  top and and bottom of card.  Fold as shown.


Card stock layers:  2 @1-7/8” X 5-3/8”; 2 @ 2-3/8” X 1-7/8”; 4 @ 1-7/8” x 1-3/8”; 2 @ 3-7/8” X 1-3/8”; 1 @ 3-7/8” X 2-3/8”


DSP layers: 2 @ 1-3/4” X 5-1/4”; 2 @ 2-1/4” X 1-3/4”; 4 @ 1-3/4” X 1-1/4”; 

2 @ 3-3/4” X 1-1/4”; 1 @ 3-3/4” x 2-1/4”


Basic White card stock for written greeting on back of last section: 1 @ 5-3/8” x 1-7/8”


I hope you'll try making a Gable Fold card soon!  They are really fun and surprisingly easy to make--just a bit time consuming.


Let's go see what Fun & Fancy Fold Rachel Traudt, our newest design team member, has for us! 


To Rachel's blog . . .

Have a wonderful November!

--Sara Nell


Sunday, September 4, 2022

Creation Station September Hop--Gold!


Welcome to the Creation Station Design Team Hop!  We're sharing "Gold" projects today.  Be sure and click on the Next Link at the end of each blog post to hop to each team member's projects. They are going to be fabulous.


For this "Gold" hop, I have paired gold embossing, Gold Brushed Metallic Card Stock (#153524) and gold embellishments with the Rustic Harvest Suite (#159648).  Each card features a different piece of Rustic Harvest designer series paper (#159633) layered over a piece of Gold Brushed Metallic card stock and a Basic Black card base (#124267, 12" x 12" card stock pack).


On this first card, the pumpkin from the Hello Harvest stamp set (#159634; bundled with the Rustic Pumpkin Dies at 10% off, #159644) was stamped in VersaMark ink (#102283) on a Cajun Craze pattern from the Rustic Harvest paper, heat embossed with Gold Stampin' Emboss Powder (Metallics Collection, #155555), and die cut with a Rustic Pumpkins die (#159643).  This die set was also used to die cut the second pumpkin and the pumpkin vines out of the Gold Brushed Metallic card stock.  The floral image from the stamp set, was stamped in VersaMark ink, heat embossed with gold, and colored with the following Stampin' Blends combos:  Cherry Cobbler, Cajun Craze, Daffodil Delight, Orchid Oasis, Pale Papaya, Old Olive and Mossy Meadow; then die cut.  The greeting was also stamped in VersaMark and heat embossed in gold on Basic Black.  It was die cut using a label die from the Harvest dies (#156504).  


The background layer was dry embossed using the Timber 3D embossing folder (#156406).  (Tip:  when I dry emboss larger sized pieces of designer series paper, I usually adhere the paper to a piece of card stock so the paper isn't torn through in places as it is embossed.  I also think it brings out more detail from the embossing folder when I do this.)  This card was finished with gold Brushed Metallic Adhesive-Backed Dots (#156506).


This card shows off the beautiful mum floral pattern from the Rustic Harvest papers.  To create the greeting banner, I used the Thanks & Hello embossing folders (#135430).  I cut a 4" x 1-1/4" piece of Basic Black card stock then placed it carefully inside the Thanks embossing folder after I had lightly sponge-brayered VersaMark ink over the inside top of the folder (the side with the Stampin' Up! logo).  The line printed at the top of the folder helped to keep the card stock straight in the folder.  I did rub the card stock strip with the Embossing Buddy (from the Embossing Additions tool Kit, #159971) before placing it in the folder.  After the strip was embossed, I covered it with Gold Stampin' Emboss powder and heat embossed it using the Heat Tool (#129053).  Once dry and heat embossed, I layered the strip over a piece of Gold Brushed Metallic card stock.  A few Brushed Brass Butterflies (158136) were added to complete the card.


After creating these cards, I'm ready for Fall and for the leaves to start turning.  Are you?  Now lets head over to Yvonne's Blog, The Creative Tea Cup, and see how she has celebrated Gold in her projects:


Have a wonderful September!
--Sara Nell


Sunday, August 7, 2022

August Creation Station Blog Hop--Anything Embossing


Welcome to the August Creation Station Blog Hop!

So glad you have joined us this month as we share our favorite embossing techniques and tips with you. Be sure you click on the "Next" link at the end of each blog post so you can see all of our projects.

Today I have two cards and am sharing three different embossing techniques and tips with you:


The first card was created using the Nature's Prints Bundle (#158801), which includes the Nature's Prints stamp set (#158793) and the Natural Prints dies (#158800).  On this card I used one of my favorite heat embossing techniques: combining Stampin' Emboss Powders to create a unique look with a bit more depth than embossing with just one color gives you:


The focal image was stamped in Versamark ink (#102283) and then heat embossed  with a combination of White and Clear Stampin' Emboss Powders (Basics Collection, #155554) and Silver Stampin' Emboss Powder (Metallics Collection, #155555).  I usually test an embossing powder combo and remix before finalizing my image.  I started out with a silver and clear combo I already had on hand but this image needed the addition of the white to make it really stand out on the card. 

The embossed piece was die cut and then arranged over three stems die cut from a foil color in the Silver Foil specialty pack (#156457, this specialty foil pack is  available until August 31 as a FREE Sale-a-Bration product choice with a minimum $50 purchase using the SAB code #163096).   The background is a piece of Sun Prints designer series paper (#158790), layered over a piece of Starry Sky card stock.  The card base is a Basic White notecard (#159232). 

The greeting was stamped in Starry Sky and then in VersaMark and embossed with Clear Stampin' Emboss Powder.  I used the Stamparatus (#146276) to easily align the double stamped image.  Our classic Stampin' Inks dry too fast to add embossing powder to the image without the addition of the VersaMark ink on the image.   The greeting was die cut using the frame die in the Natural Prints Dies.
Pearl Basic Jewels (#144219) complete the card.

The second card was created using the Botanical Layers Bundle (#158920).  This is a unique bundle as it includes the Botanical Layers stamp set and the Lovely Layers Vellum pack (#158919).   


This card was inspired by one of the printed vellum pieces.  I wanted to recreate the design in color and created it on another pattern in the vellum pack:


You cannot stamp on vellum with our classic inks without embossing the images with clear embossing powder because vellum is non-porous, meaning that it will not absorb the ink so it can dry.  Since the ink does not dry, you can add the embossing powder right over the ink without using VersaMark.  My process for creating the card was to stamp all the images using one color, cover them with Clear Stampin' Emboss Powder and heat emboss, then stamping with the next color.  I used the low setting on the Heat Tool (#129053) so that the vellum would not curl so much.  I stamped the larger images first, then added the smaller ones.  Ink colors used:  Parakeet Party, Garden Green, Tahitian Tide, Fresh Freesia, Orchid Oasis, Pale Papaya and Sweet Sorbet.  The stamped and embossed vellum piece was layered over a piece of Basic White card stock, then over Orchid Oasis card stock.  The card base is Basic White Thick card stock. 

The greeting was stamped in Orchid Oasis and then die cut with a Stylish Shapes banner die (#159183).  Starry Sky and Tahitian Tide 2022-24 In Color Matte Decorative Dots (#159186) complete the card.

I hope I've inspired you to try some new ideas with your heat embossing.  Now let's head over the Vicki Boucher's blog to see her embossed creations.  She is a very talented member of Stampin' Up!'s Artisan Team this year, so I am so excited to see what she is sharing with us.


Have a wonderful week!
--Sara Nell 


Thursday, August 4, 2022

Teacher's Treats--#tgifc379

The TGIF Challenges team has challenged us to focus on Back to School.  My first step for this challenge was to check with my daughter.  My 3-year-old grandson is returning to his day care/school in a couple of weeks after spending his summer home with his dad, who is set to return to his teaching job.  Katharine and I decided that it would be nice to give Easton's two teachers a little chocolate treat as they welcome Easton back to his classroom and help him get used to the school routine again.  If it was up to Easton, these treat bags would be all about dinosaurs.  However, I thought the teachers would rather have something pretty:


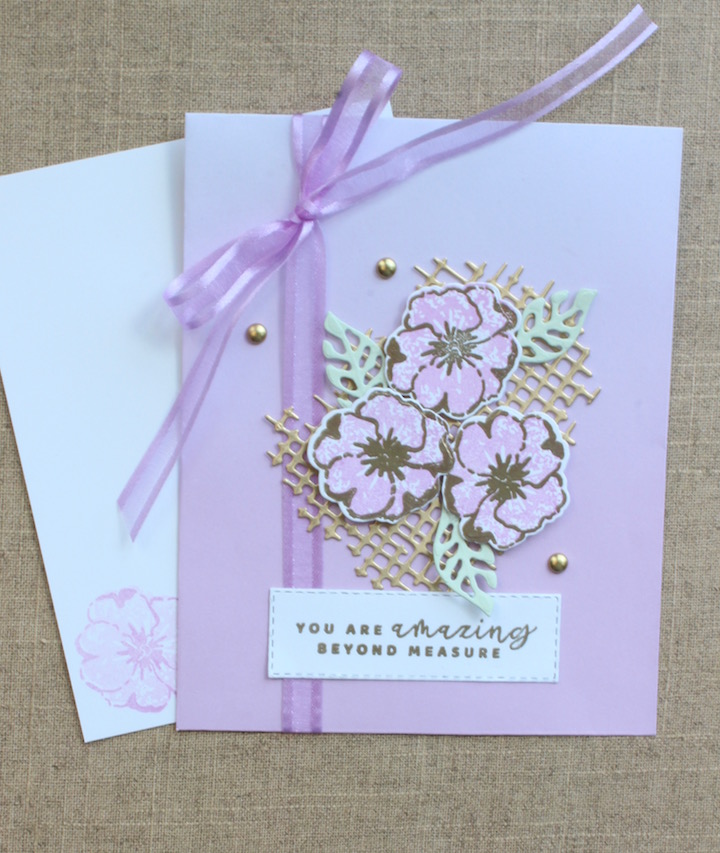
I pulled out two retired Ombre Gift Bags--one in Fresh Freesia and one in Polished Pink for the treat bags.  I decorated them using my new favorite and already well-used Season of Chic Bundle (#158816), which includes the Season of Chic stamp set (#158810) and the Chic Dies (#158815).  The netting die was used to create the background for the flowers out of Brushed Metallic card stock (#153524).  This card stock is now a FREE Sale-a-Bration product choice with a minimum $50 purchase using the SAB Item #163103. 


I used the two-step stampin' flower images to create the flowers on each card.  The flower base image was stamped in the color of the bag (Fresh Freesia or Polished Pink). The flower outline image was stamped in VersaMark ink (#102283) and then heat embossed with Gold Stampin' Emboss Powder (Metallics Collection, #155555).  The leaves were die cut out of Soft Sea Foam card stock.  The greeting was also stamped with VersaMark and heat embossed with gold.  It was die cut using the Stitched Rectangles dies (#151820). 
 

The bags were finished with Brushed Metallic adhesive backed dots (#156506) and tied closed with Open Weave ribbon:  Fresh Freesia (#155615) and Polished Pink (#155714).  Inside each bag is a 5-1/2" x 4-1/4" Basic White card stamped with a two-step flower.  This card is for Easton to "sign".  And, just because something couldn't be from Easton without a dinosaur, it will also be stamped with a coordinating dinosaur image from the retired Dino Days stamp set.  

I misplaced the Dino Days stamp set after making a 4th of July card for Easton,  so I couldn't stamp the dinosaur image for this challenge.   I'll have to find it hidden among the chaos that is my stamping room while I am decluttering and reorganizing.   This process is taking me a very long time!  But that stamp set is around here somewhere.  I'll find it again before I have to mail the treat bags for Katharine to fill with chocolate.

Find more Back to School Ideas over at the TGIF Challenges Blog here. 


Have a great day!
--Sara Nell


July Creation Station Blog Hop: Case The Catalog

  Hello!  Welcome to the Creation Station Blog Hop!  We are a team of Stampin' Up! Demonstrators from around the world who create a hop ...